December 2025 - Custom Content Modding (Alpha)
.jpg&w=3840&q=75)
I'm happy to announce the new Modding System! This alpha release opens up Sissy University for community-created content, letting you design and share your own classes, degrees, partners, items and more!
What Can You Create?
The modding system lets you create Entities - that's what we call the different types of game content like Degrees, Courses, Classes, Punishments, Clubs, and Partners. You can also create:
- Classes - Design custom training classes with unique tasks and requirements
- Degrees - Create new degree programs with custom prerequisites
- Courses - Build course curricula that group classes together
- Clubs - Add new extracurricular activities
- Partners - Design AI partner personalities with custom prompts
- Punishments - Create consequences for misbehavior
- Tags - Add new content categorization tags
- Items - Create items with custom stats and images
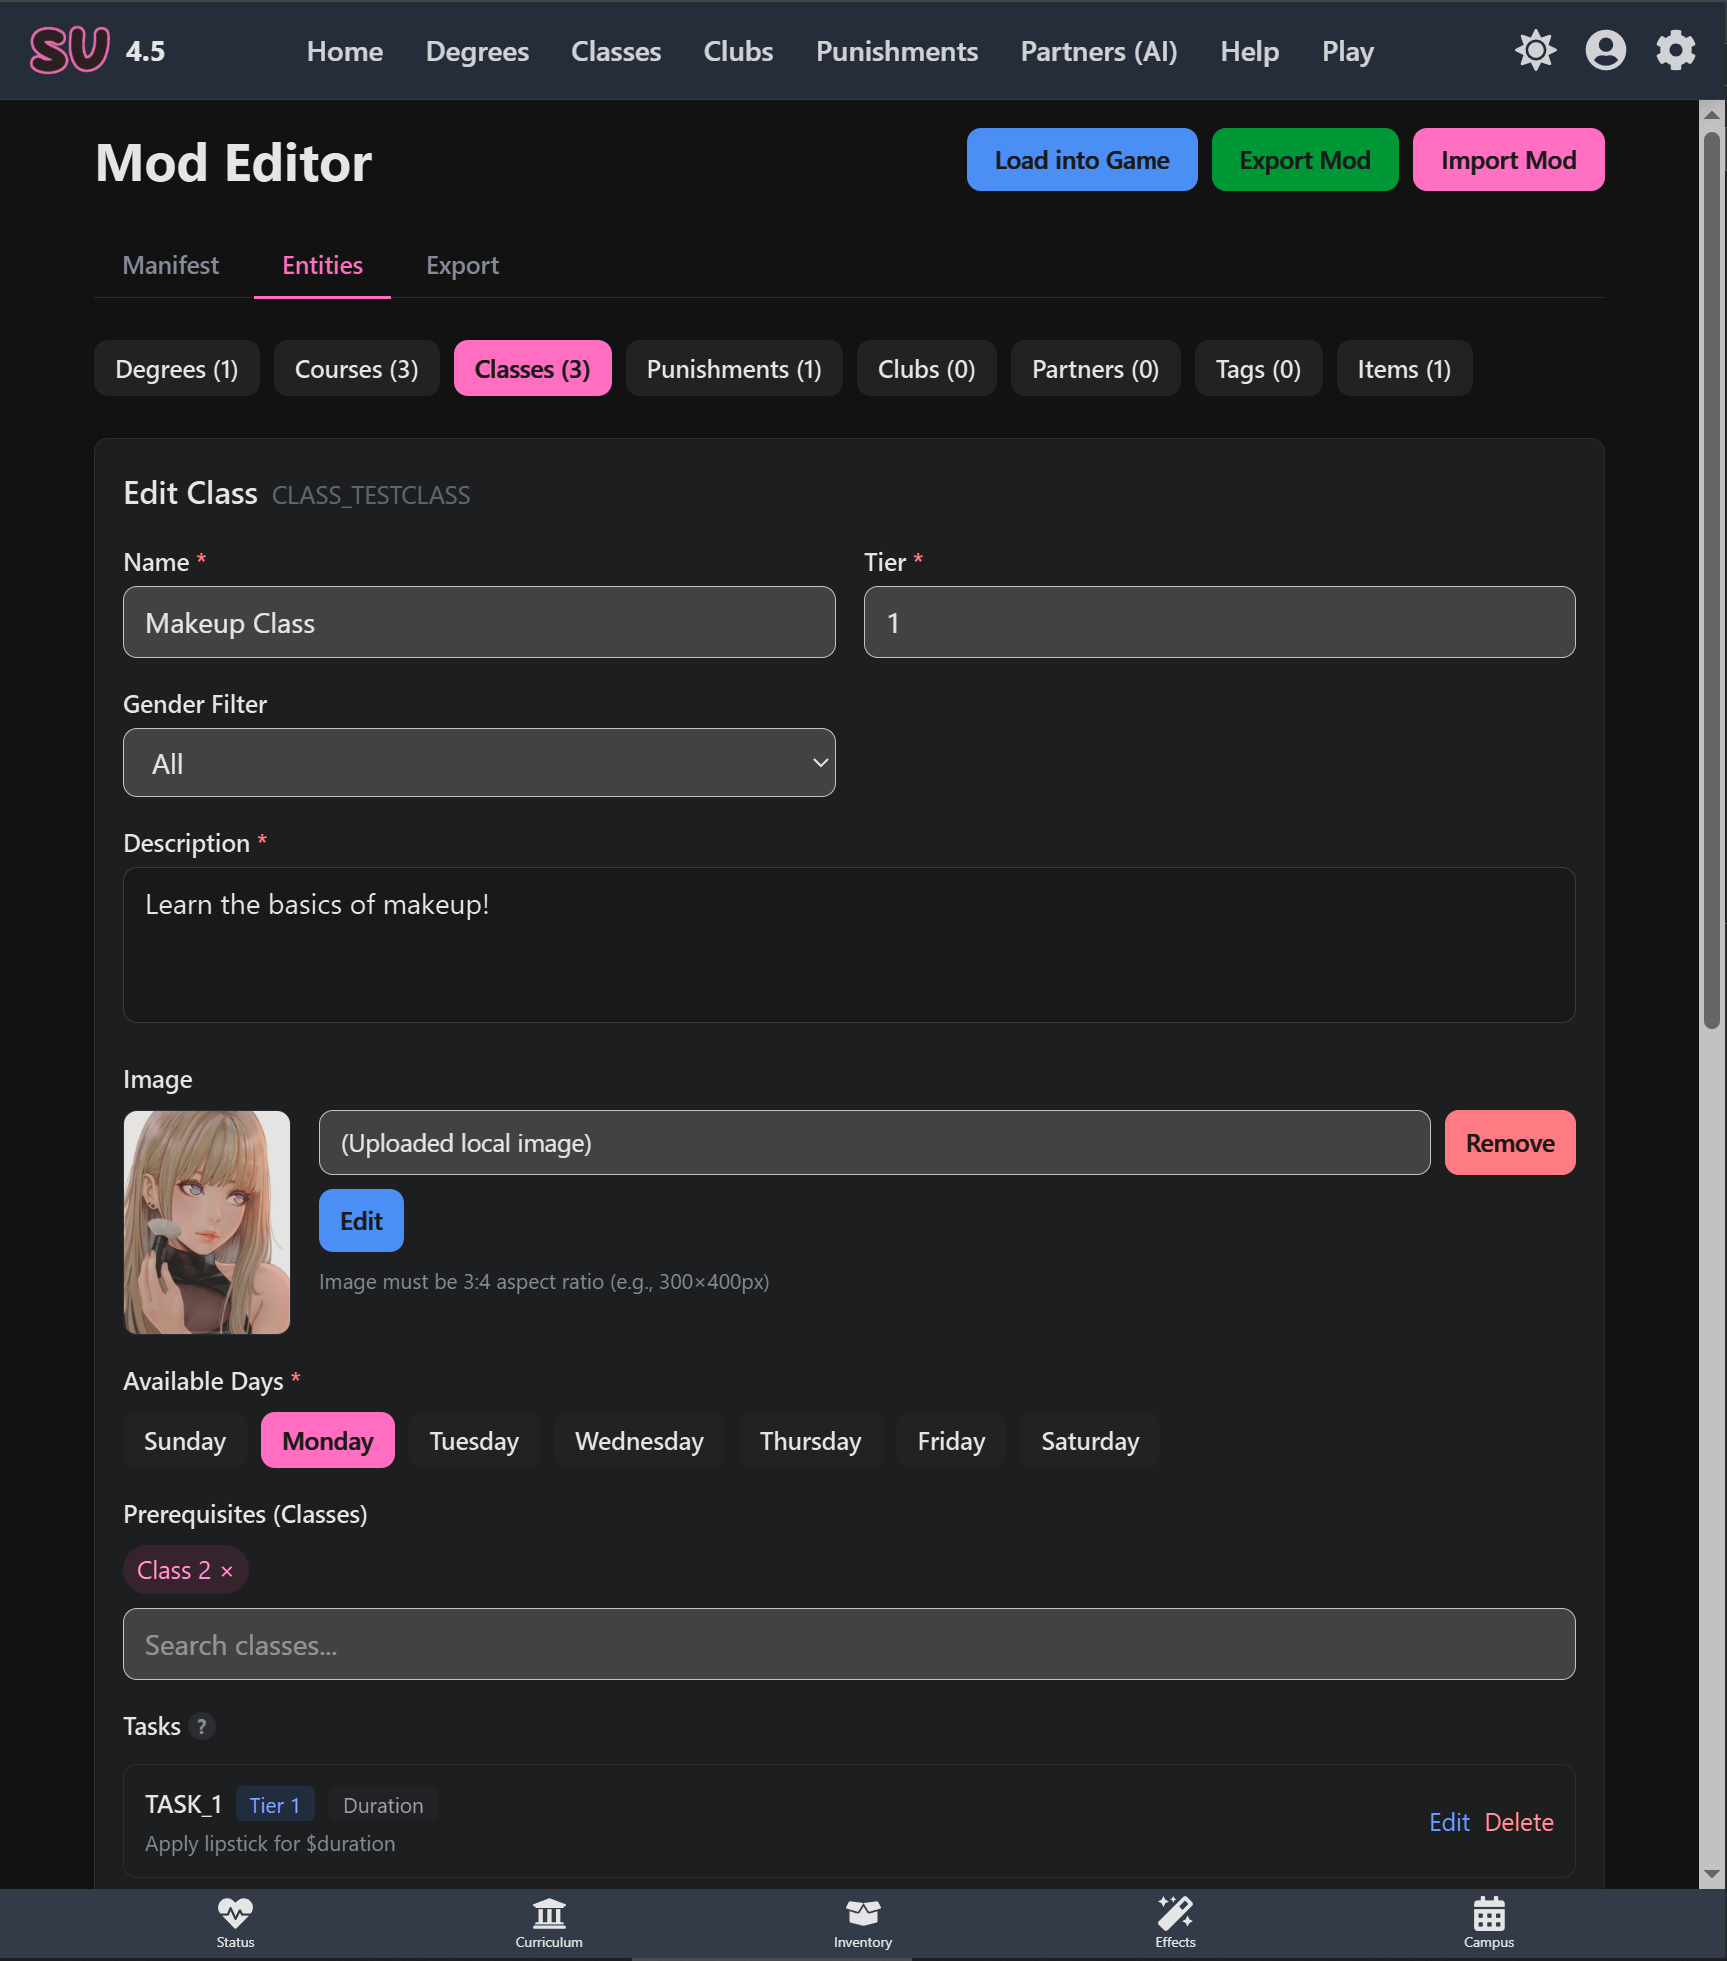
Mod Editor
The built-in Mod Editor tool provides everything you need to build mods without any coding knowledge:
Key Features
- Your Info - Add your name and a link to your website, which will be shown on the front page of the game if your mod is loaded
- Entity Editors - Visual forms for creating each type of game content
- Image Upload - Add images via URL or file upload - they're stored inside your mod-pack and automatically optimized
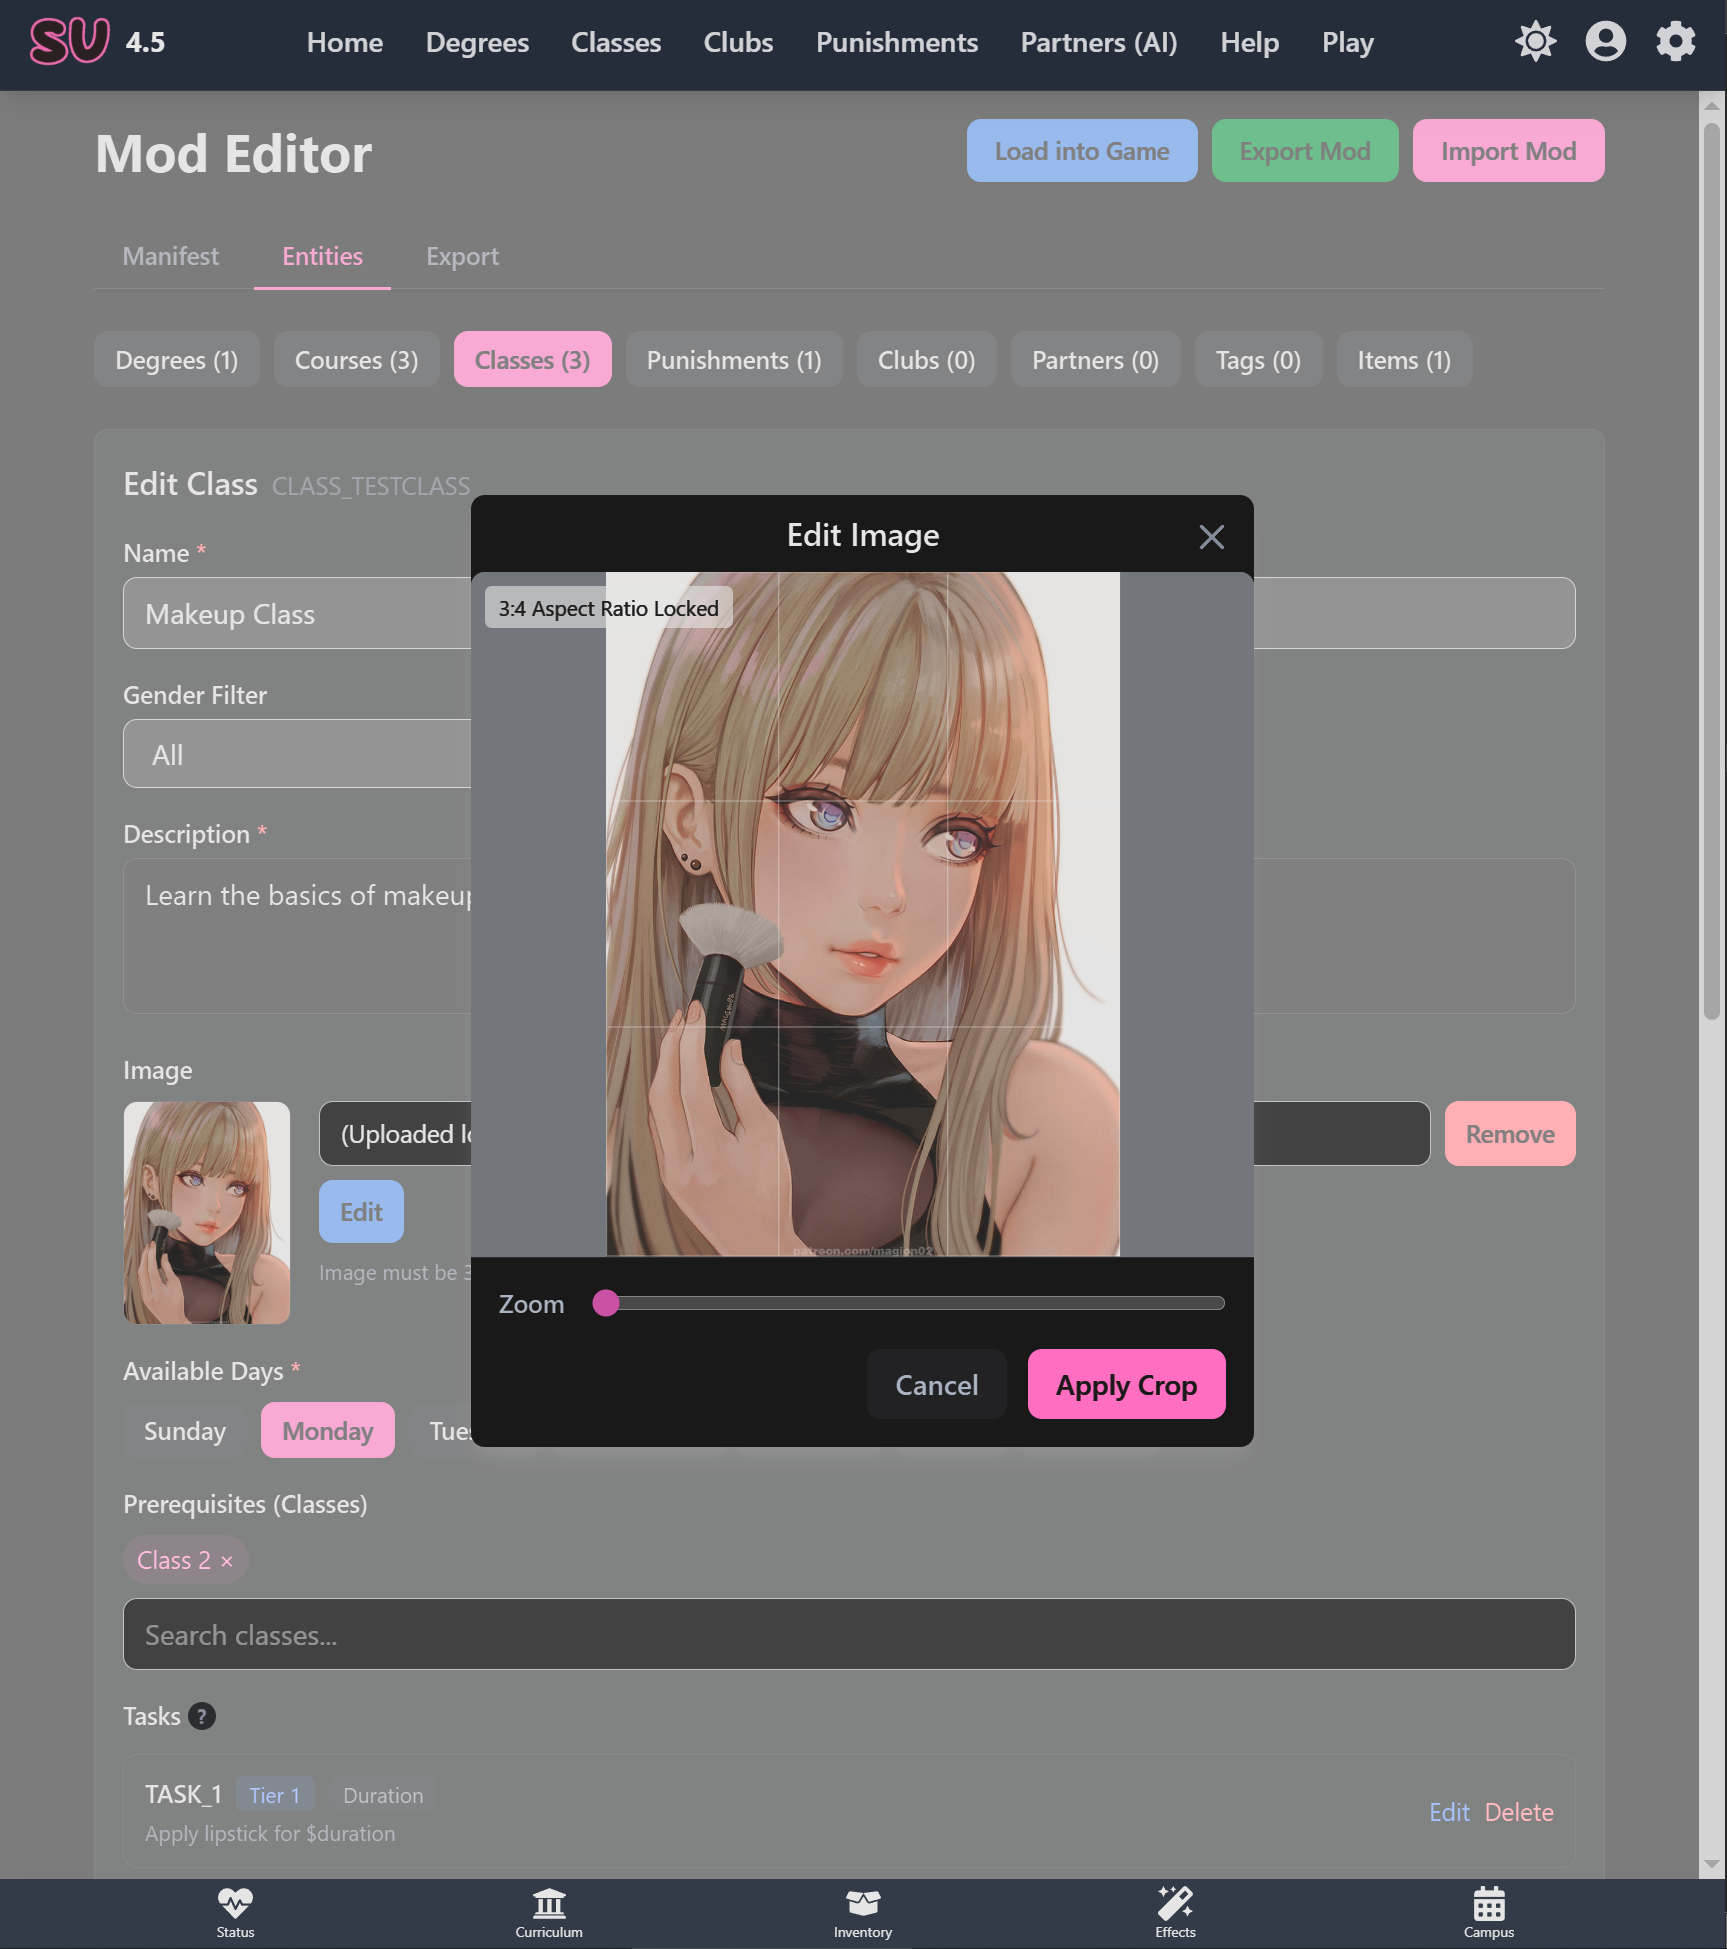
- Built-in Image Editor - Crop and resize images with automatic aspect ratio enforcement
- Easy Export - Download your complete mod as a single
.jsonfile
Creating Your First Mod
- Go to the Mod Editor from
Settings -> Mods - Fill in your mod's name and your details
- Switch to the Entities tab and select what you want to create
- Click "Add" and fill in the entity details
- Upload or paste images as needed
- Go to the "Export" tab and and export your mod. It can take some time for your images to be optimized.
- Import the
.jsonfile into the game to test it out - If everything is good - share your mod with the community!
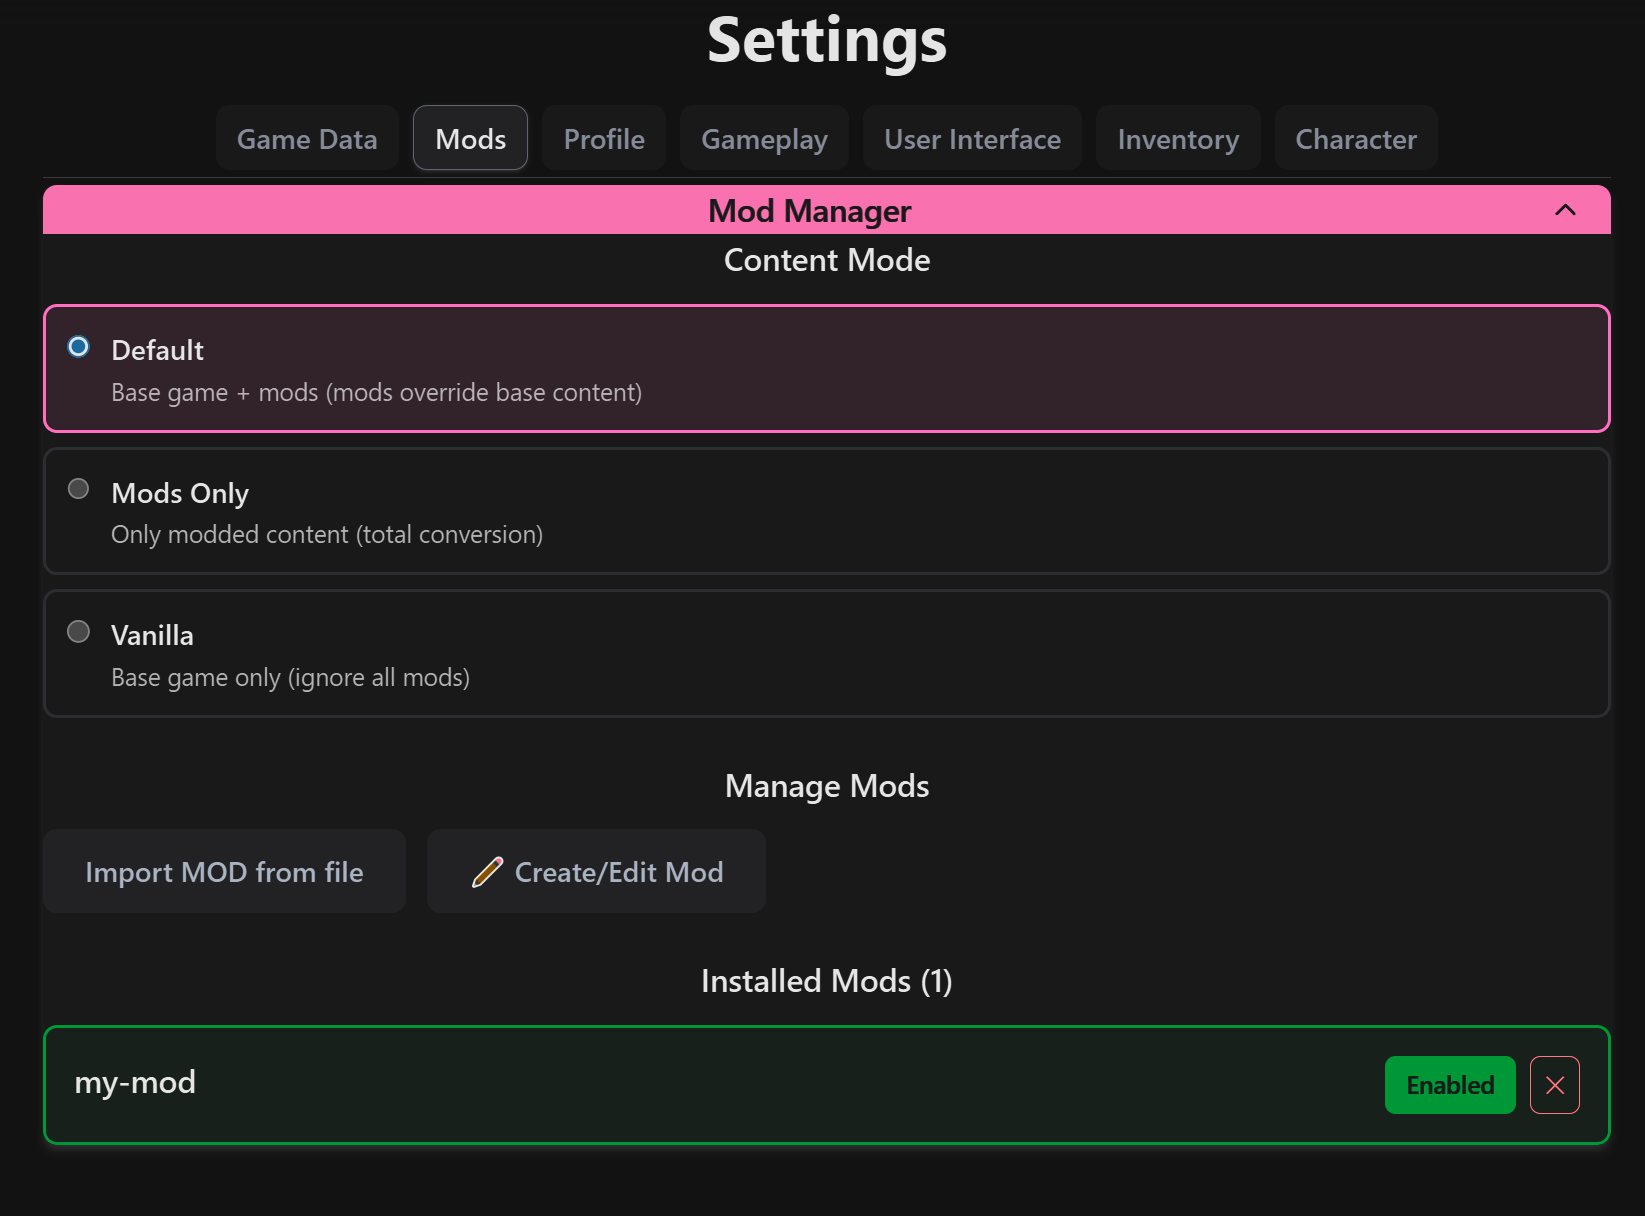
Installing Mods
Installing community mods is simple:
- Go to Settings → Mods
- Click "Import Mod" and select the
.jsonfile - Toggle mods on/off as desired
- Click "Apply Changes" to reload the game content
Content Modes
You can also control how mods interact with base game content:
- Default - Base game + all enabled mods (mods can override base content)
- External-only - Only mod content, no base game
- Internal-only - Only base game, ignore all mods
Image Handling
The modding system has specific requirements for images to ensure consistency. All images are stored inside your mod file and automatically optimized on export.
Entity Images
These are the main images for Classes, Degrees, Courses, Clubs, Partners, and Punishments:
- Aspect Ratio: 3:4 (portrait orientation)
- Max Resolution: 768×1024 pixels
- Format: Automatically converted to AVIF on export
The built-in image editor helps you crop and resize images to the correct aspect ratio.
Item Images
For equipment and accessory icons:
- Size: 256×256 pixels (square)
- Format: PNG with transparent background
- Color Depth: 8-bit color recommended to save space
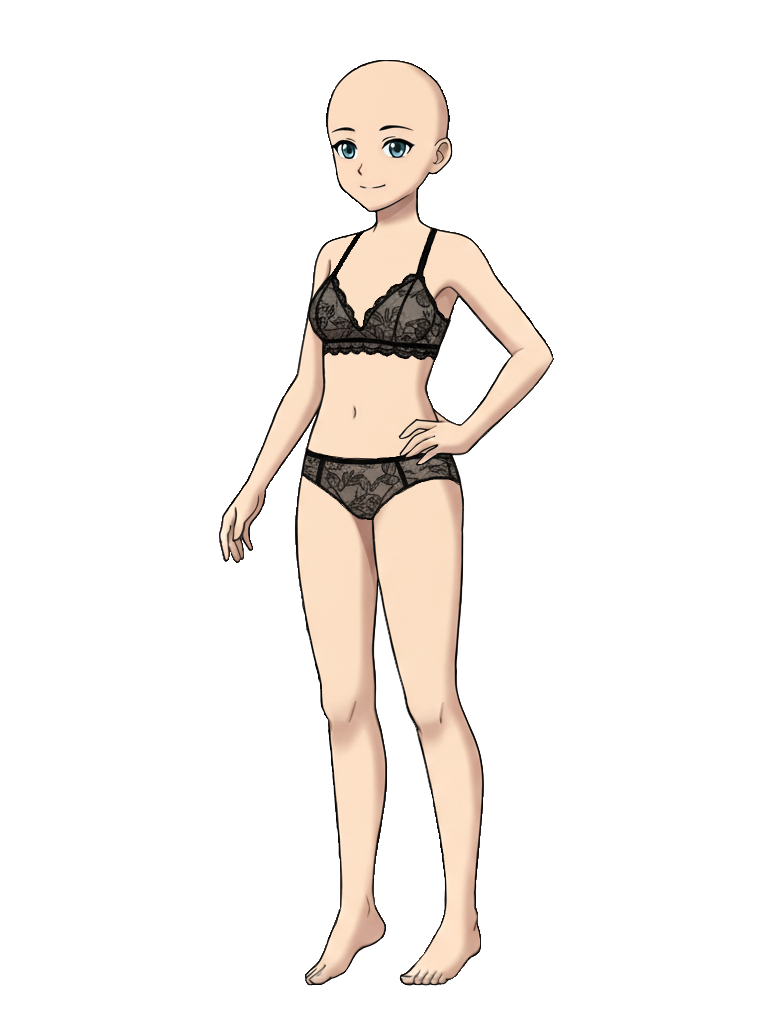
Wardrobe Images
For items that appear on your character in the dress-up / wardrobe minigame.
- Size: 768×1024 pixels
- Format: PNG with transparent background
- Important: The image should contain only the item, positioned so it overlays exactly on the base character image
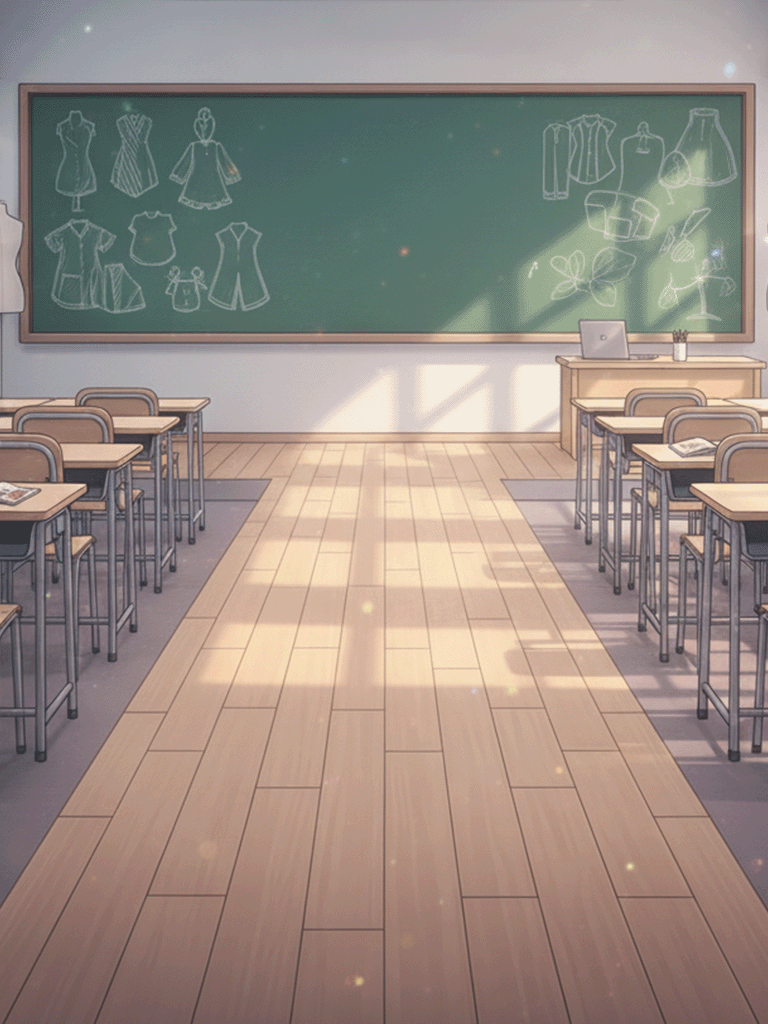
To create wardrobe images, download these reference files and use them as a template:
- Download Base Character Image - Use this to align your wardrobe items
- Download Background Template - Background reference
Alpha Notice
This is an alpha release of the modding system. While the core functionality is working, you may encounter some rough edges. Your feedback is invaluable in helping improve this feature!
Please report any issues or suggestions:
- Join our Discord community for direct feedback
- Describe any bugs you encounter
- Share ideas for improving the mod creation experience